9 Steps to Prep Walls for Painting
With more Americans working from home and spending more time inside than ever before, it's no surprise that folks want to wake up their interior walls with fresh color. Paint choices affect our mood and focus and can even increase the value of your home. Blue paint will have you feeling anything but, with light blue bathrooms and dark blue bedrooms boosting your home's value by as much as $4,698.
Before you grab the rollers and start painting, take a moment to prepare your space the right way. For the best results and a fabulous-looking room, learn how to properly prep interior walls for painting in nine easy steps.
1. Remove Everything From the Walls
Unless it's permanently affixed, remove all items from the walls to store in another room, including curtains, floating shelves, artwork, mirrors and other decorations. Remember to remove:
- Nails: Pull out nails with a hammer or pliers.
- Wall plates: Remove outlet covers and light switch plates with a screwdriver. It's much easier to paint around electrical devices with those out of the way.
- Wall hardware: Take down mounting brackets, curtain rods and shelf hardware.
Use tape and plastic bags to keep screws with their respective items so you can quickly put everything back once the room is painted.
2. Protect Furniture and Flooring
Remove smaller furnishings and place them in another room to create more space. Push the larger remaining pieces of furniture to the center of the room and cover them with plastic sheets.
To safeguard your flooring, skip the bedsheets — the thin material won't prevent spills from seeping through. And plastic sheeting may be waterproof, but it's slippery to walk on and keeps paint drips wet longer, increasing the likelihood of accidentally tracking wet paint through the house. Instead, use what professional painters use — canvas drop cloths. Canvas absorbs drips and prevents slips, and it's durable enough to last a lifetime of paint projects.

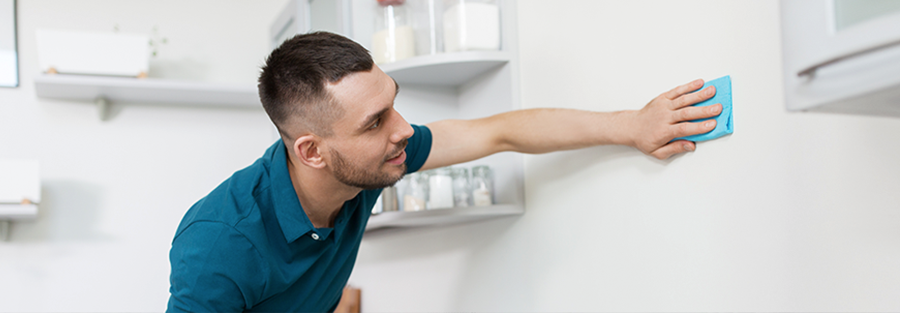
3. Dust and Clean the Walls
Cleaning is a key step before painting. First, dust ceiling fans and light fixtures to prevent particles from falling onto freshly painted walls. Then vacuum and dust the walls with a towel. Use a sponge, warm water and cleaning products to remove embedded dirt.
For heavily used rooms where grime, soap scum or grease residue can build up over time, like the kitchen or bathroom, use hot water and a degreasing detergent. Wipe down the walls, then follow up with a damp towel to wash it away. Make sure the walls are completely dry before the next steps.
4. Address Any Mildew
Thoroughly check your walls for any trace of mildew or mold. You must remove this properly because it will ultimately return if not addressed. The good news is, there's a simple solution!
Wear a mask and gloves for your protection. Then, mix a solution that is three parts water to one part bleach. Apply the solution to the affected area and let it sit for a few minutes. Scrub the area with a soft brush and wash it off with warm water. Again, make sure the wall is dry before continuing.
5. Fill Holes and Repair Imperfections
If your home was built before 1978, use a lead paint test kit before you start repairs. If your walls test positive, contact a professional for removal and paint prep.
If your walls are lead-free, carefully scrape off flaking paint with a paint scraper or putty knife. Focus on the loose stuff — there's no need to dig out areas still firmly attached to the wall. Use sandable spackling and drywall joint compounds to fill nail holes, cracks and uneven surfaces.
How to Repair and Prep Plaster Walls for Painting
Damaged plaster requires special care and protection:
- Protect your eyes with safety goggles.
- Cover your skin with a long-sleeved shirt and gloves.
- Prevent dust inhalation with a respirator.
Scrape away loose pieces with a putty knife and dampen the area with a spray bottle of water. Follow the manufacturer's instructions to mix dry plaster and water in a bucket and apply a plaster layer to the damaged area using a wallboard knife.
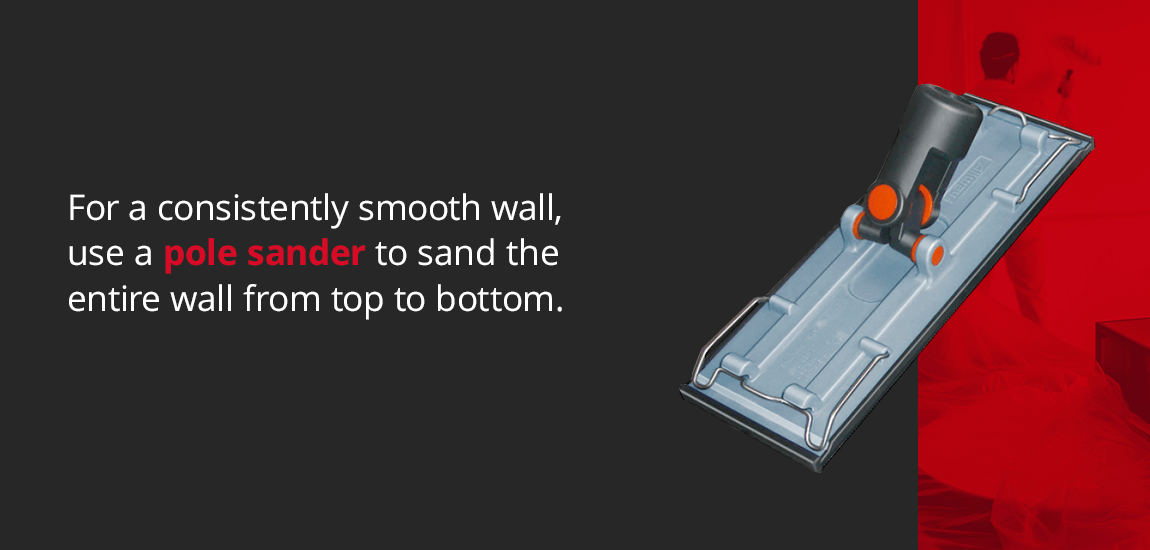
6. Sand the Walls Smooth
Now that your walls are clean and holes are filled, you're ready to prep walls for painting with sandpaper. Every wall has imperfections, whether it was previously painted or a brand-new spackled wall. It is essential to take your time with this step because the better the wall is sanded, the better the painted wall will look.
Use sandpaper or a sanding block to smooth the roughest parts of the walls. On areas where a high-gloss paint was used, you may need to use medium-grit sandpaper to smooth the surface. For a consistently smooth wall, use a pole sander to sand the entire wall from top to bottom.
7. Dust Again and Vacuum
After the sanding dust settles, it's time for one more round of dusting. Vacuum the fine layer of dust from window trim, moldings and baseboards. Wipe down walls with a barely damp towel or large sponge. A quick once-over is all you need.
If there's dust accumulation on the drop cloths, you'll want to avoid kicking up those particles during the painting process. Vacuum the protective cloths, or carefully remove and shake them outside, then replace them in the room. Once the walls are dust-free and dry, you're ready for tape.
8. Tape Around Trim and Baseboards
Tape off woodwork, trim and adjacent wall edges with painter's tape. It's crucial you use the correct tape for the job. Avoid the time-consuming chore of fixing paint peeling or bleeding with these tips:
- Choose the right tape: Always use true painter's tape, not masking tape. Masking tape leaves a sticky residue and can rip the wall surface during removal.
- Prevent paint bleeds: Once you apply tape around moldings and trim, use a putty knife to press it down for an airtight seal. This prevents paint bleeding and helps it peel away cleanly after painting.
9. Prime Your Walls
Pros know that primer is the key to an excellent paint finish. When you fill holes and damaged wall areas with joint compound, that compound will draw the moisture out of your paint layer and create a problem called flashing — noticeably dull spots with lesser color integrity and sheen. Primer will seal these spots to prevent flashing, hide imperfections on the wall and create a smooth surface for the paint.
There are different primers to use in different situations, such as painting over a darker color. Select the best primer for your job:
Now Let's Get Painting!
Congratulations, you are ready to paint! This is the most fulfilling part of the project.
Start with the right painting supplies — a top-quality angle brush, rollers and paint trays. Selecting paint is more than simply picking a lovely color — be sure to choose the right type of paint and finish for your room, and test swatches before ordering mixed cans.
Enjoy your completed room!
Choose Aboff's for Superior Paint Products and Expert Advice
Aboff's Paints has helped Long Island contractors and homeowners successfully prep walls for painting for over 30 years. More than just a paint supplier, our proudly run family business loves to serve our communities and you by offering decades of superior painting advice and experience.
Whether your project is big or small, we can help! For a paint job done right, shop our wide selection of paints and supplies online.
Have paint questions? We've got answers. Call our expert staff at 516-701-2123 or contact us online to determine the best products to complete your vision.

Sources:
- https://www.cnbc.com/2020/12/15/one-in-four-americans-will-be-working-remotely-in-2021-survey.html
- https://www.hgtv.com/design/remodel/interior-remodel/the-psychology-of-color
- http://zillow.mediaroom.com/2021-07-15-Homes-With-Light-Blue-Bathrooms,-Dark-Blue-Bedrooms-Could-Sell-for-Up-to-4,698-More-Than-Expected
- https://aboffs.com/collections/drop-cloths/products/1-mil-9x12-plastic-drop-cloths
- https://aboffs.com/collections/drop-cloths
- https://aboffs.com/collections/cleaners-cleaning-supplies
- https://www.epa.gov/lead/protect-your-family-sources-lead
- https://aboffs.com/collections/blades-scrapers-knives
- https://aboffs.com/collections/patching-kits-compounds
- https://aboffs.com/collections/hand-sanding-abrasives
- https://aboffs.com/collections/hand-sanding-abrasives/products/allway-ups-pole-sander
- https://aboffs.com/collections/tapes
- https://aboffs.com/collections/all-primers/products/fresh-start-high-hiding-all-purpose-primer
- https://aboffs.com/collections/all-primers/products/high-hide-cover-stain
- https://aboffs.com/collections/all-primers/products/aboffs-first-step-563-latex-mp-primer
- https://aboffs.com/collections/all-primers/products/ultra-spec-500-primer
- https://aboffs.com/collections/brushes
- https://aboffs.com/collections/interior-paints
- https://aboffs.com/pages/contact-us